Author: Luigi Pulcini
Test Tabs
HOME
Some content.
Working with WooCommerce
WavePlayer allows any WooCommerce user who sells audio-related products to automatically insert an instance of the player in connection with each product.
Whether you use your website to sell songs or licenses of your music library or sound effects or the latest episodes of your podcast, you probably experienced the hassles of manually adding a player in the short or full description of your products. WavePlayer offers you a seamless integration, using the WooCommerce product editor you are already familiar with.
PREVIEW FILES

It is important to understand the meaning and purpose of preview files. When you sell downloadable products, WooCommerce uploads their related files to a special folder that is restricted from any access in the browser. This makes those files not accessible to any other elements of your website, including WavePlayer.
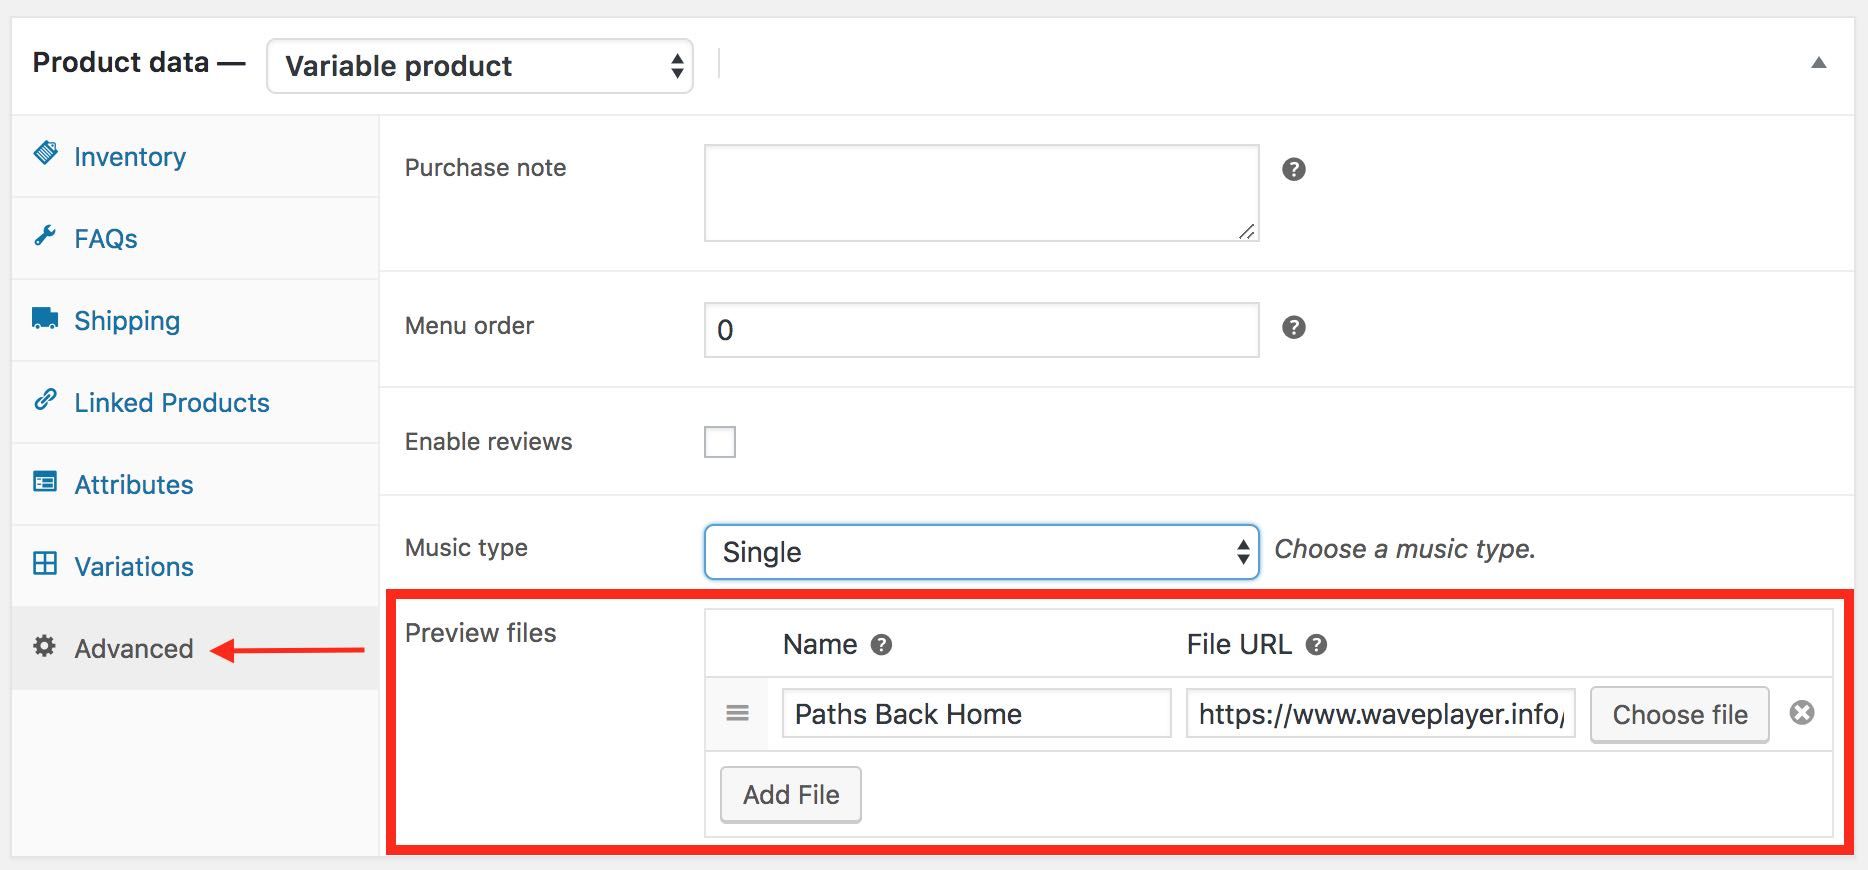
That is why WavePlayer adds a Preview File section to the Advanced tab of the WooCommerce product editor. When you add one or more preview files to a WooCommerce product, WavePlayer will automatically insert into the product page and the product list item of the Shop page an instance of the player containing those preview files.
HOW TO ADD PREVIEW FILES TO A PRODUCT
If you want to take advantage of the WooCommerce integration, you can follow these steps:
- go to Products and open the product you would like to edit
- in the Product Editor, select the Advanced tab
- click on the Choose file button to select the preview file you want to use for this product
- if you want to add more preview files (for example, if your product contains multiple audio files, such as an album or a sound effect collection), click on the Add File button and repeat the previous step
- once you are done with adding the preview files to the current product, click on the Update button
WavePlayer will store the preview files as metadata of the corresponding product in the database.
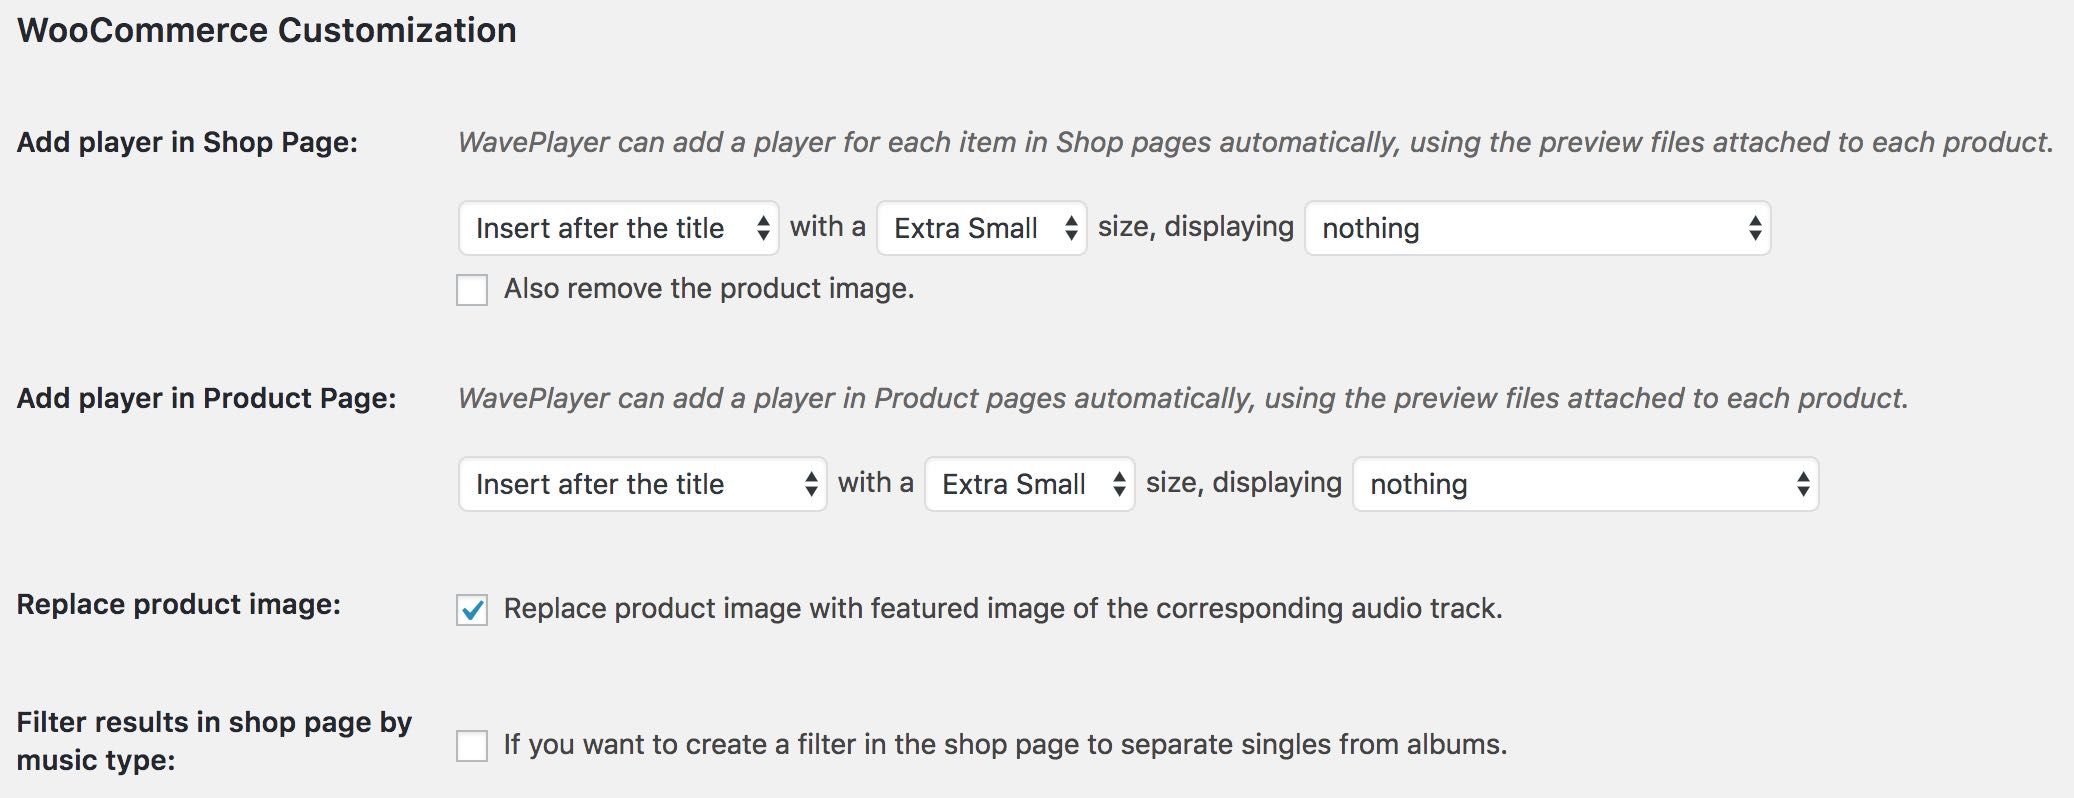
AUTOMATIC INTEGRATION
The main advantage of the preview file is that you can let WavePlayer do automatically what you used to do manually when you had to add a player in the description of the product. Moreover, this automation avoids any possible problem with the formatting of the page, because WavePlayer always inserts the player following the configuration you choose in the settings, for both the Product Page and the Shop.
GENERAL GUIDELINES
As we pointed out earlier, it is important to understand that preview files should be different from downloadable files, as you don’t want to freely expose in the browser what your visitors are supposed to buy. When preparing the preview files of your downloadable tracks, you want to consider what follows:
- due to most web servers limitations (particularly the shared hosting plans), WavePlayer is not capable of automatically cutting a shorter preview file off of a longer downloadable file: this is something you have to prepare yourself and upload to the website separately
- for the same web servers limitation, WavePlayer cannot automatically watermark audio files: another area where you have to prepare your files separately
- only use the Preview Files section to upload your preview files: if you accidentally upload both downloadable files and preview files using the Downloadable files section, your preview files won’t be accessible by WavePlayer. Thus, WavePlayer, like any other player, won’t be able to play them back.
- you can list multiple preview files to a single product (as an example, think of an album composed of several different songs): when WavePlayer finds a product with multiple preview files, it automatically creates a playlist in association with that player instance. How this playlist is going to appear on the page depends on how you configured the WooCommerce integration settings.
- albeit possible, we discourage from adding the same preview file to multiple products: when you choose to show a cart button or a product link in a playlist, that button or link refer to the product the track is associated with. If you associate the same track to multiple products, WavePlayer might not be able to retrieve the correct product and the result could create confusion. For this reason, recommend using one unique file for each product.
Installing WavePlayer: a step-by-step guide
How to install WavePlayer
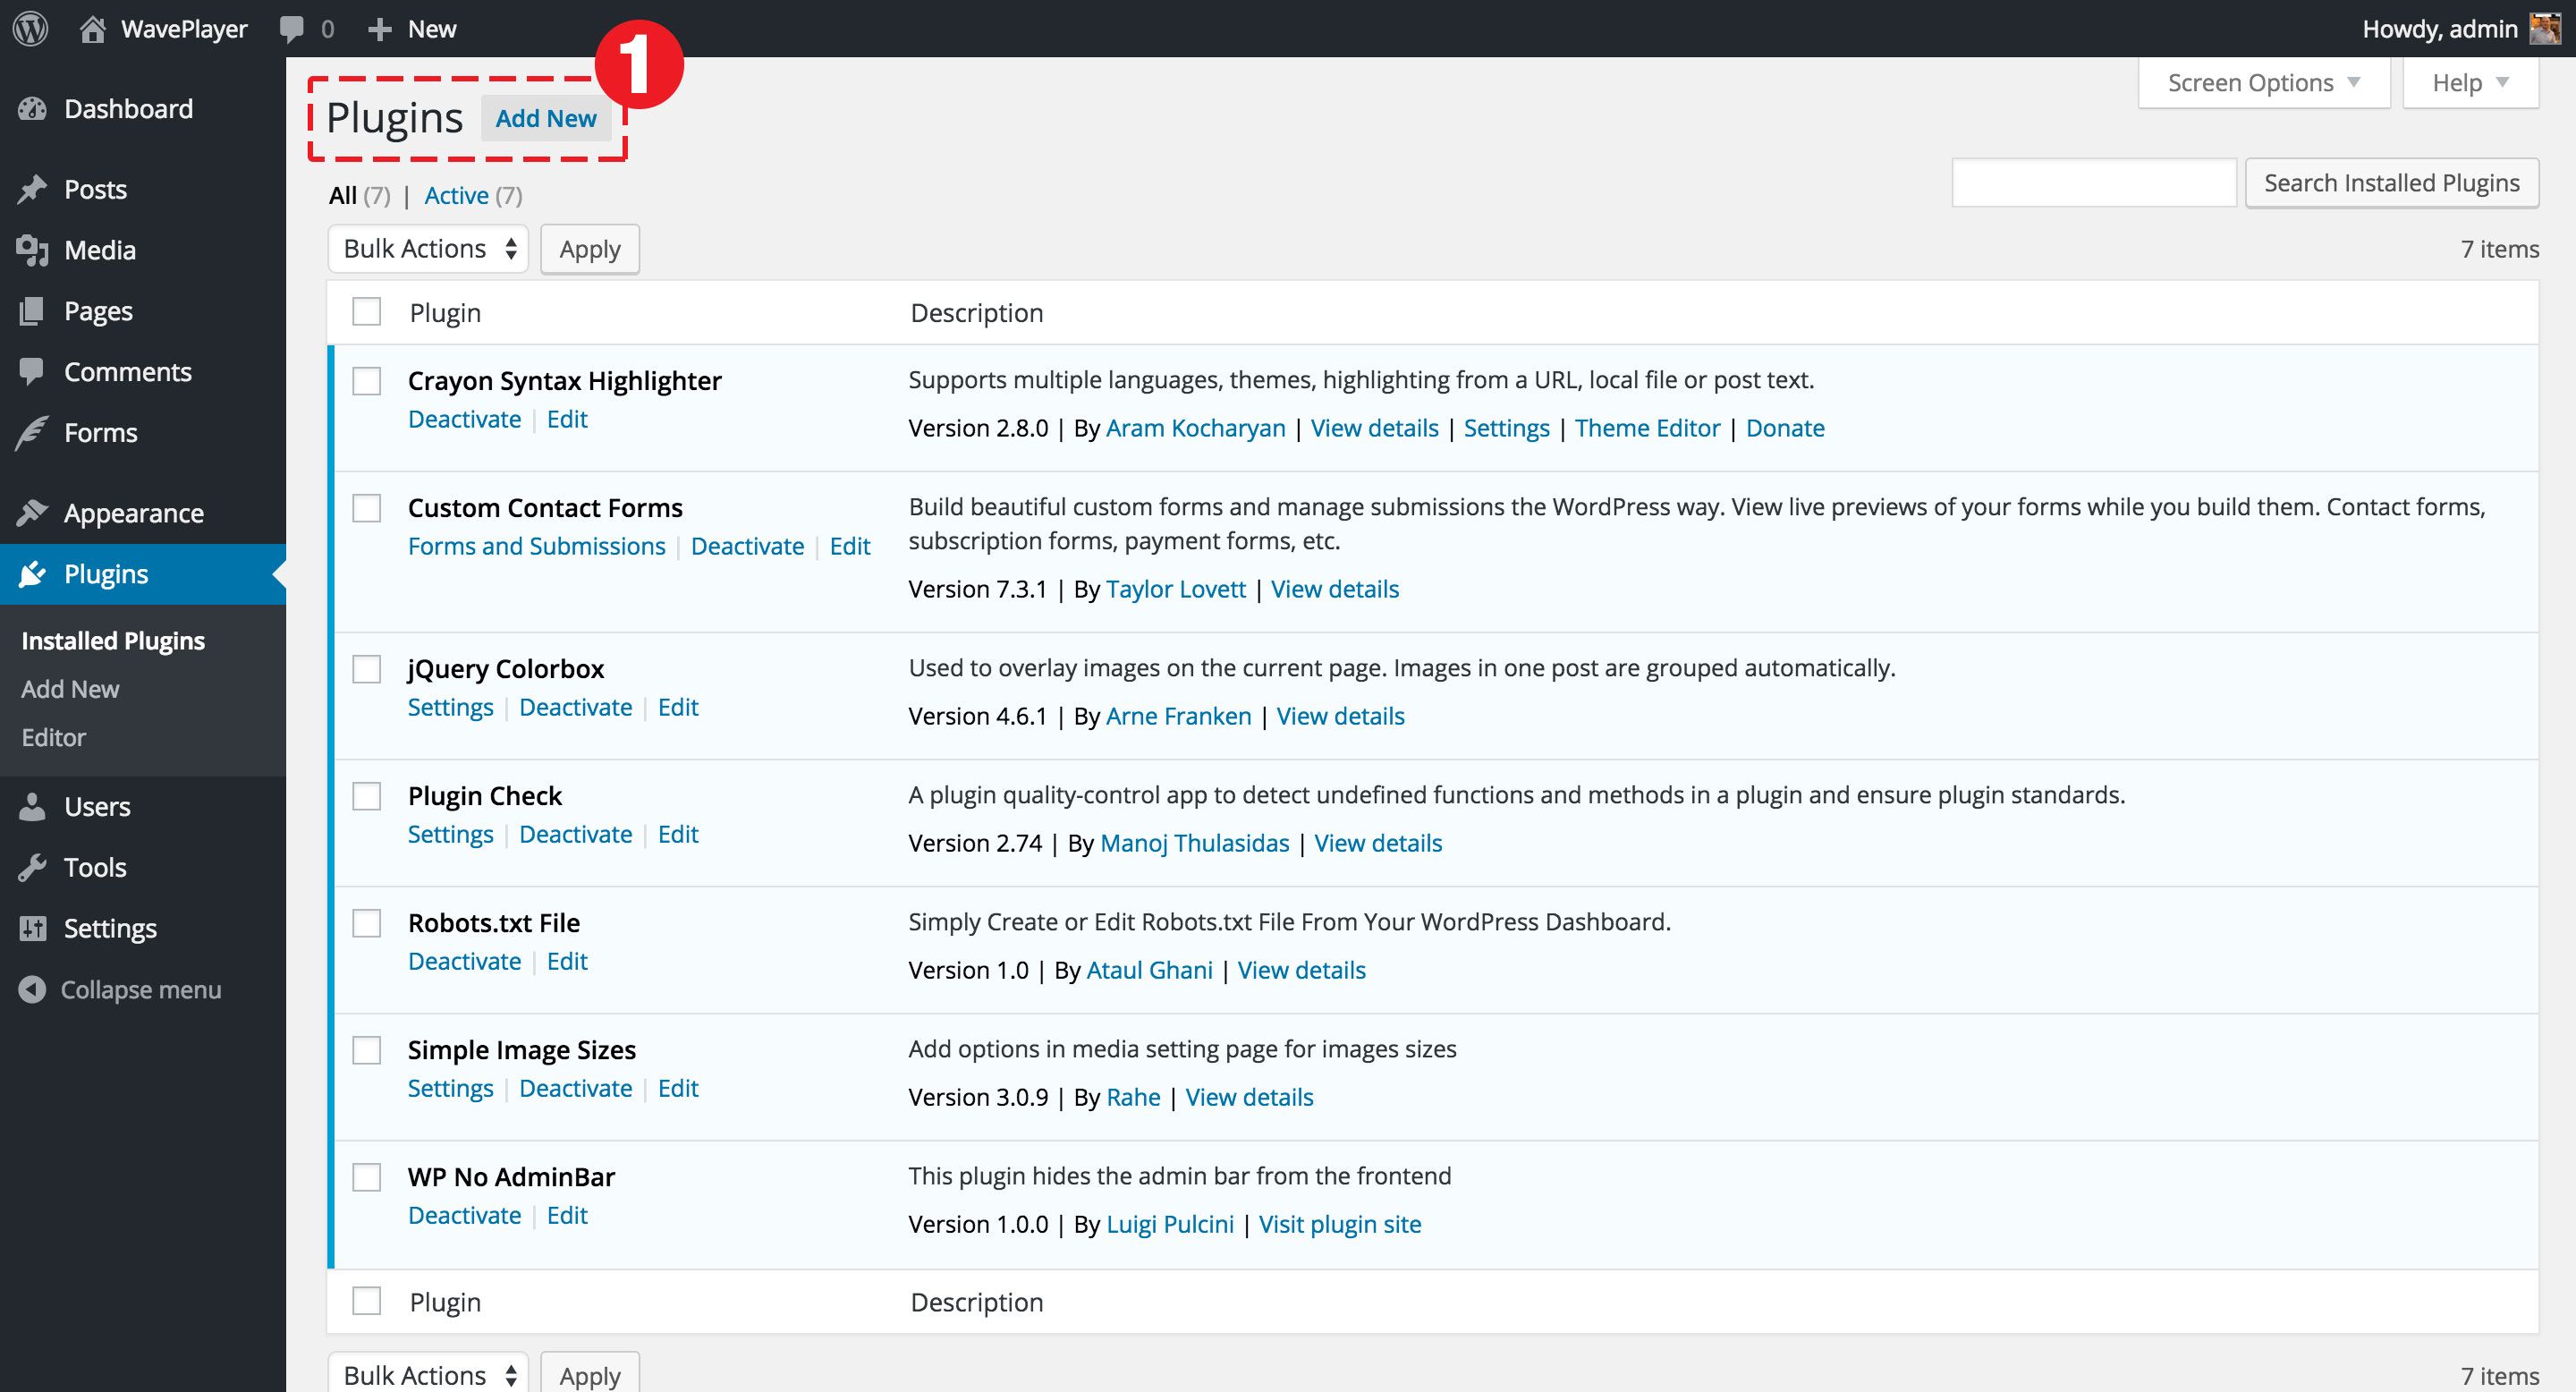
- Step 1
- In order to install the plugin, go to the WordPress Plugins section, click on the Add new button, right beside the Plugins page title.
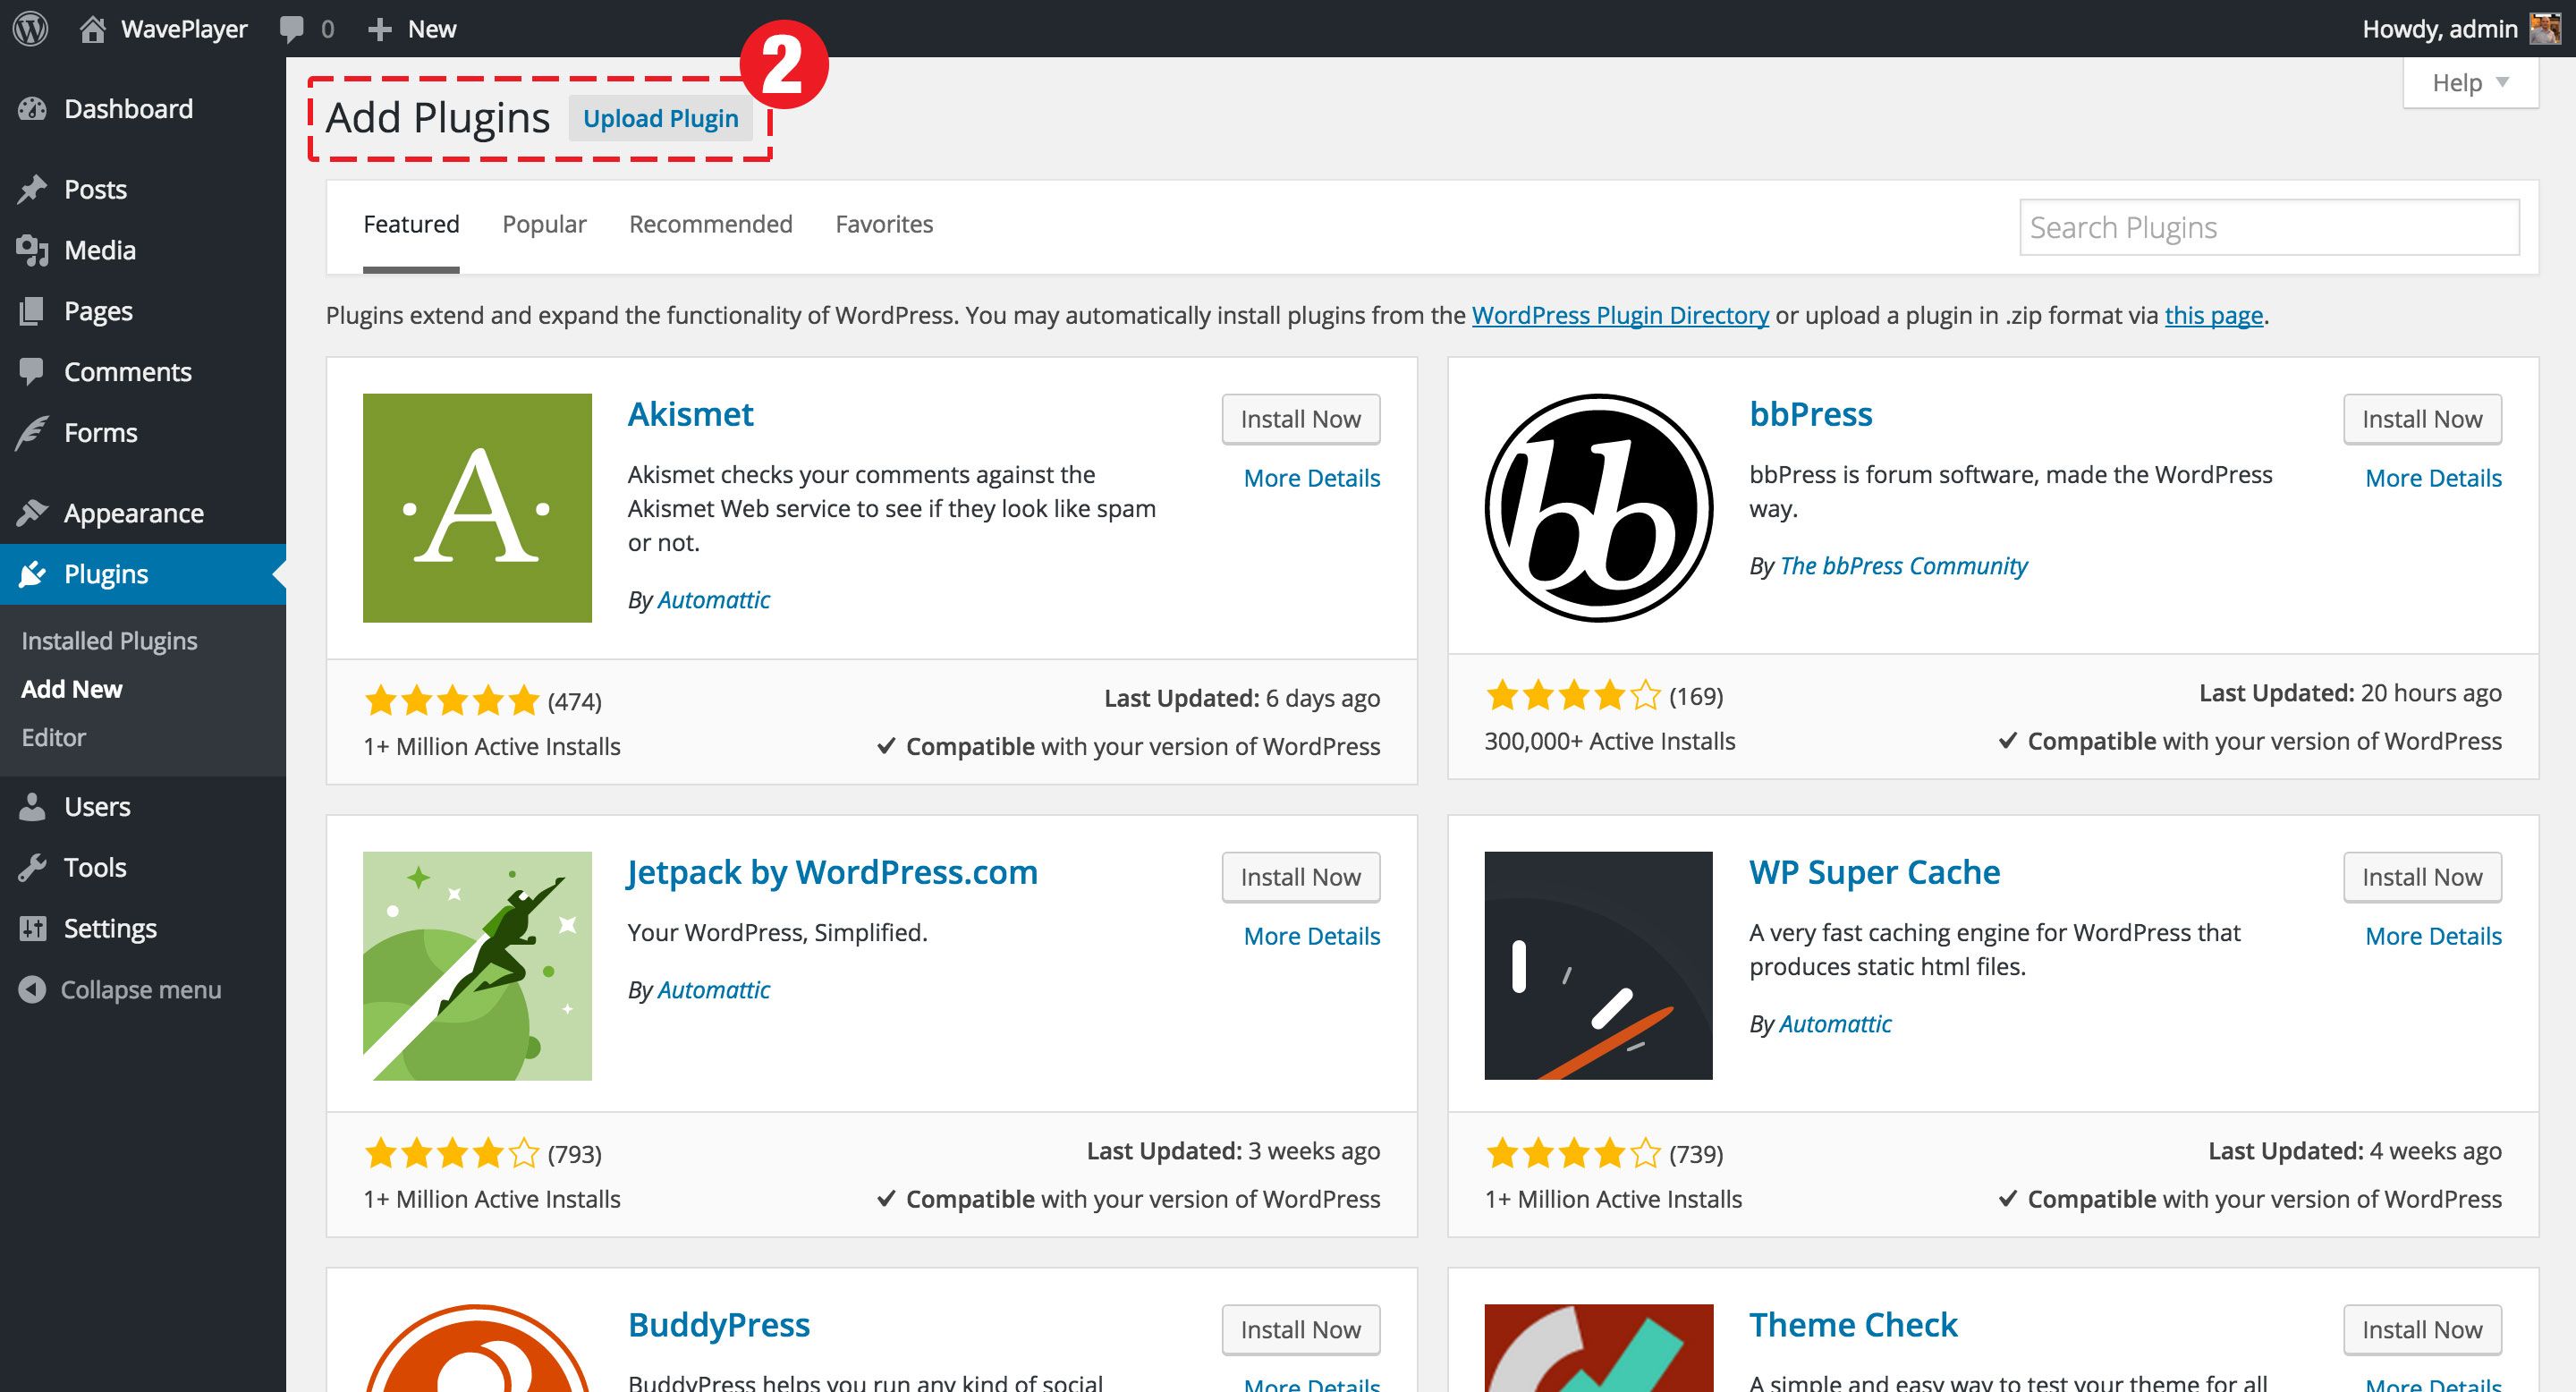
- Step 2
- Click on the Upload Plugin button, right beside the Add Plugins page title.
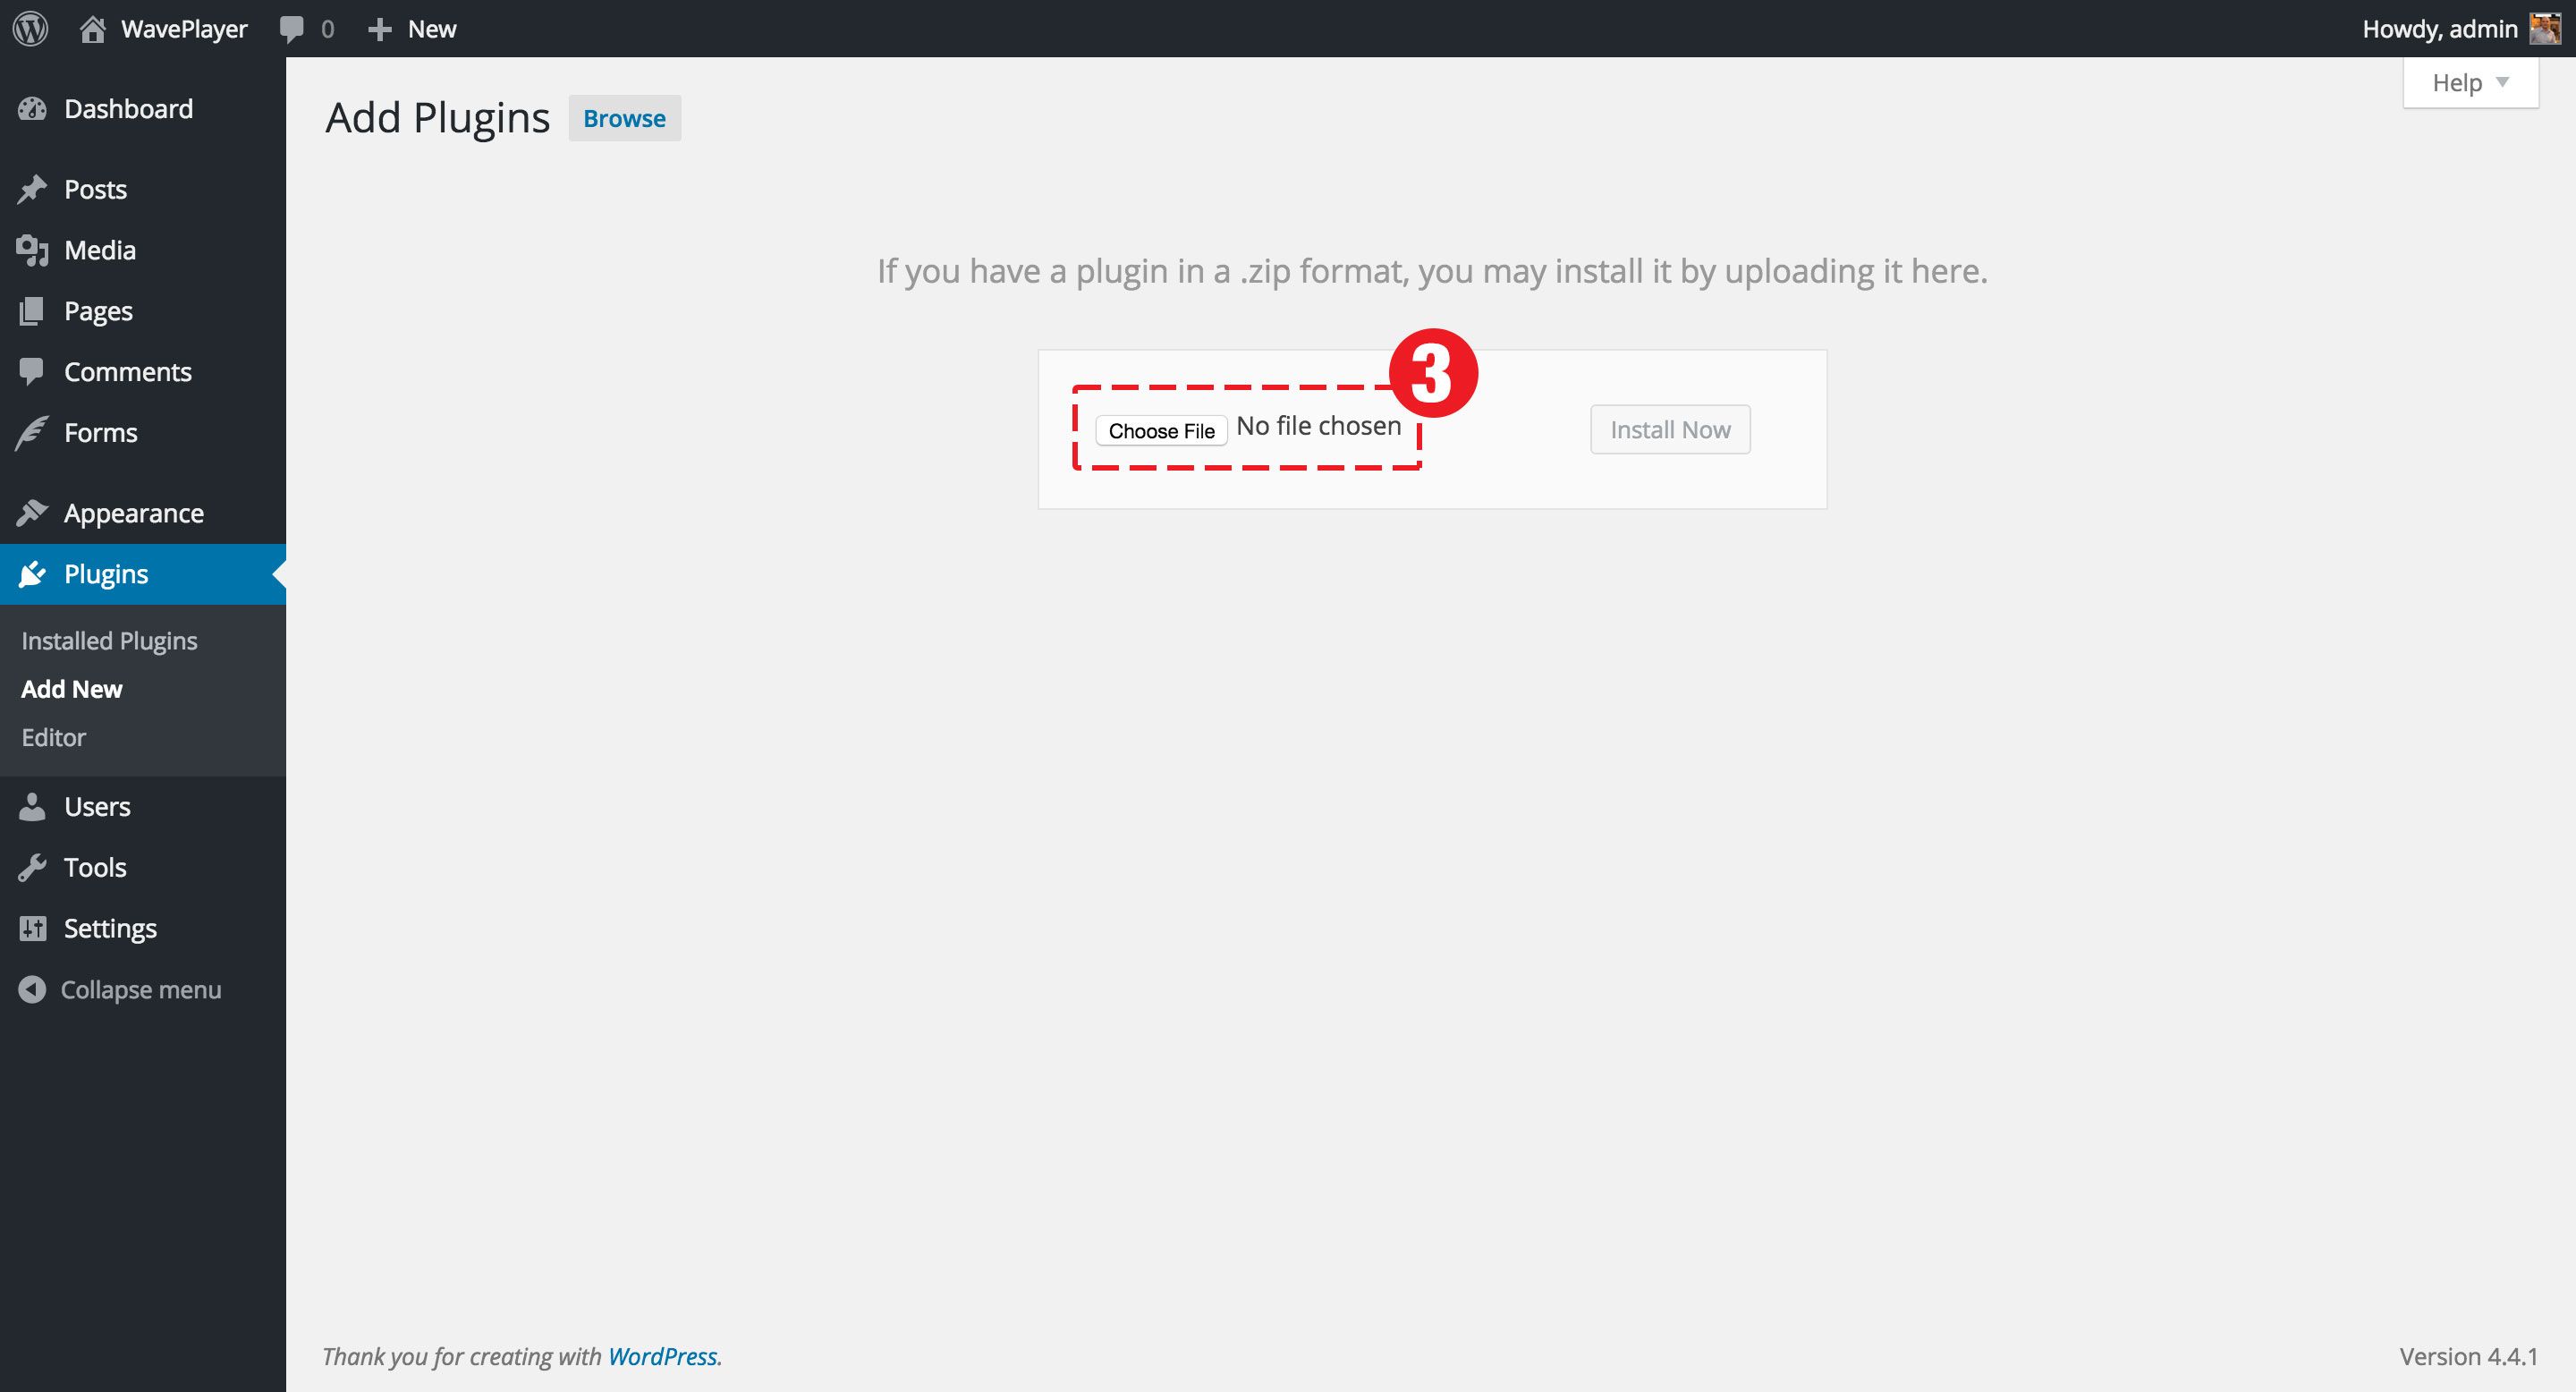
- Step 3
- Click on the Choose file button in order to select the location of your waveplayer.zip file.
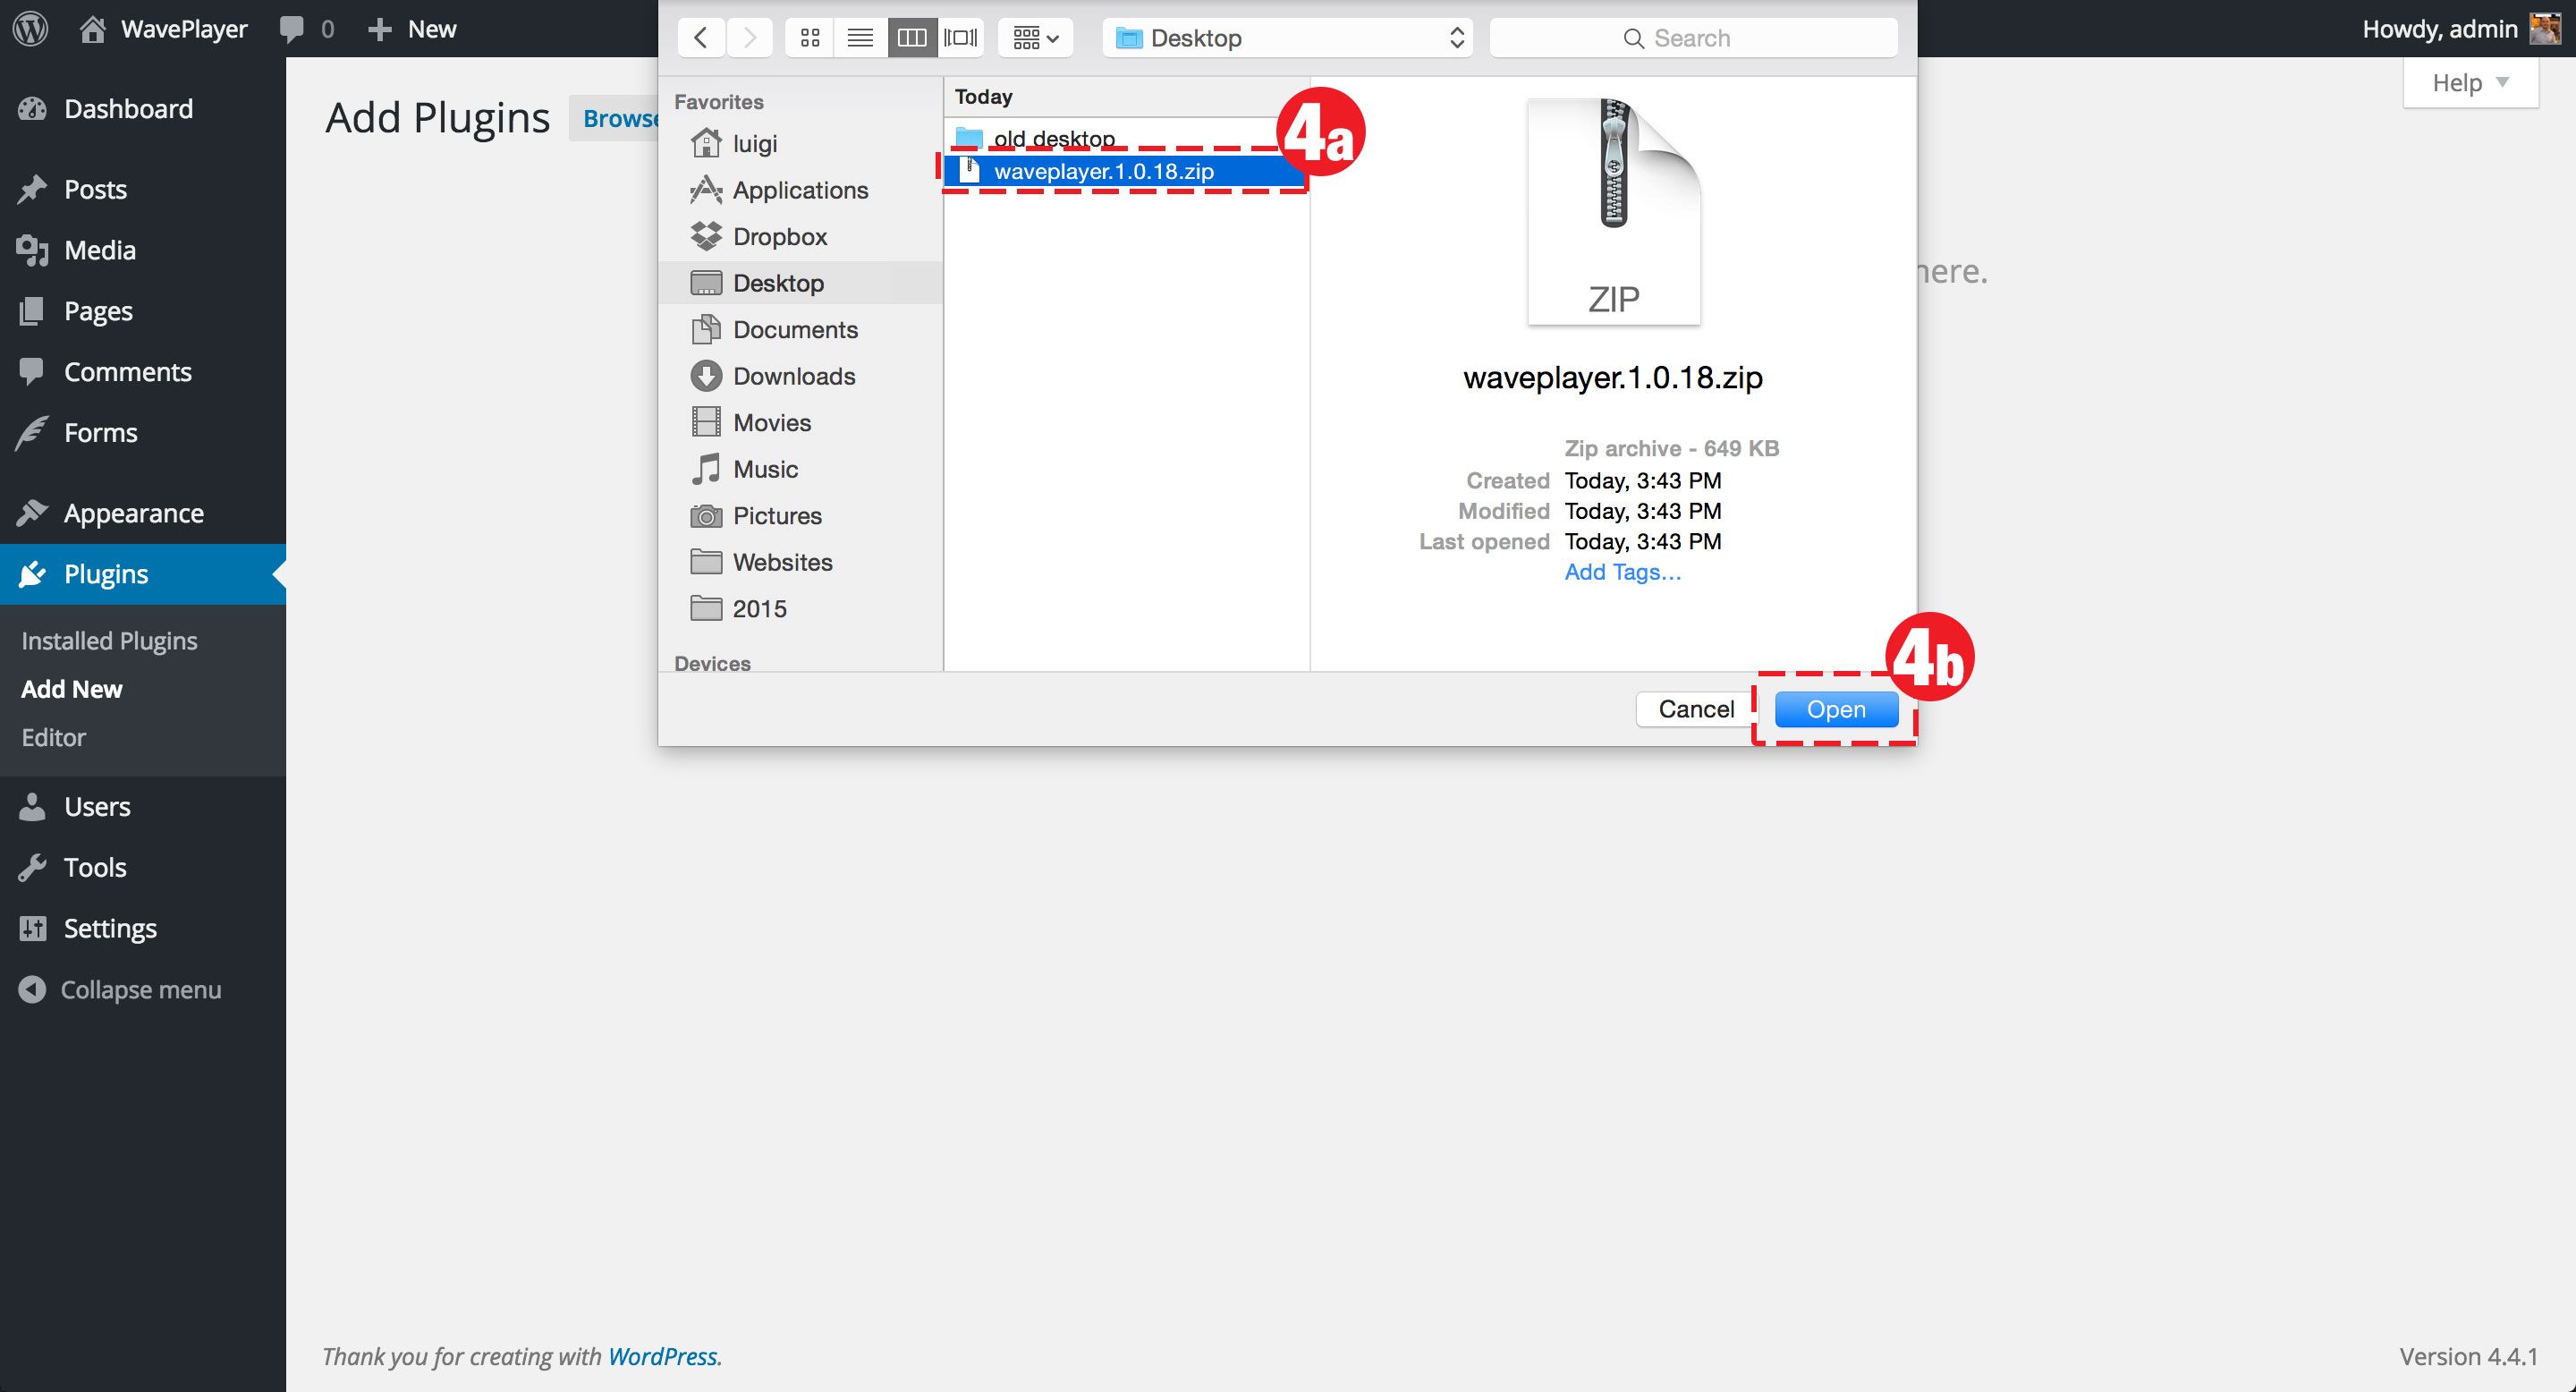
- Step 4a
- Browse to the location where you downloaded the waveplayer.zip file.
- Step 4b
- Click on the Open button.
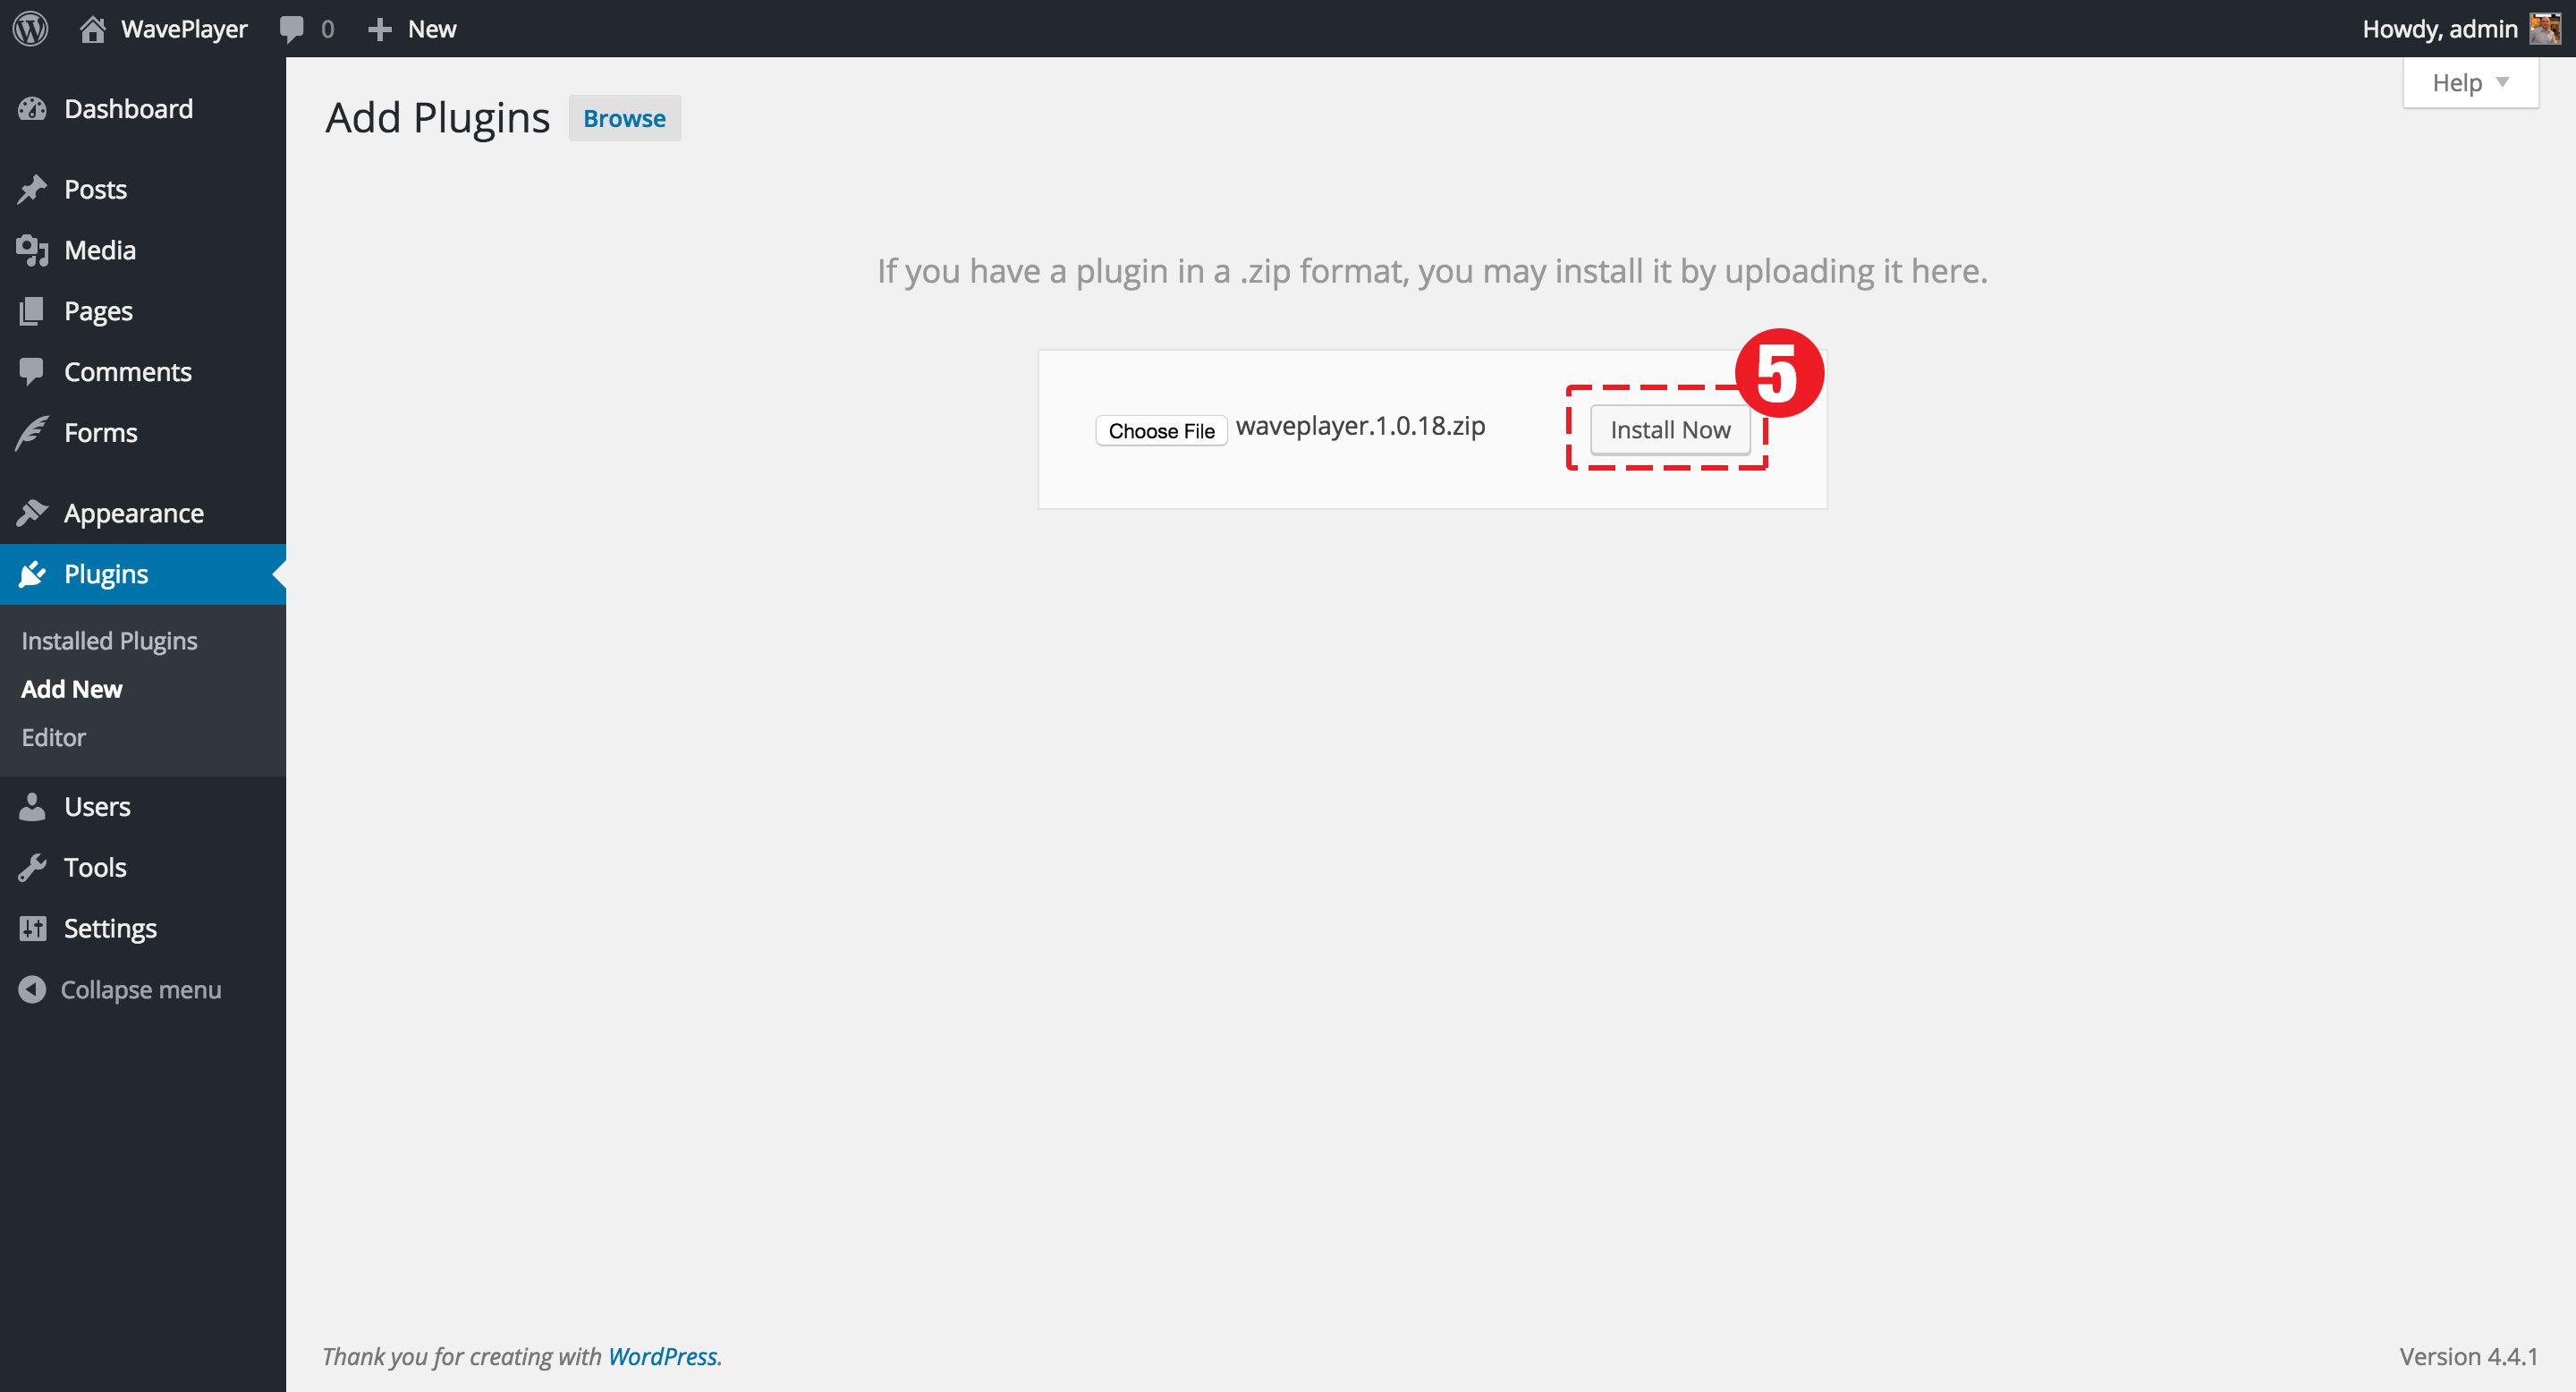
- Step 5
- The plugin is now active. You can click on the Settings link right below its name or go to Settings -> WavePlayer to configure its options.
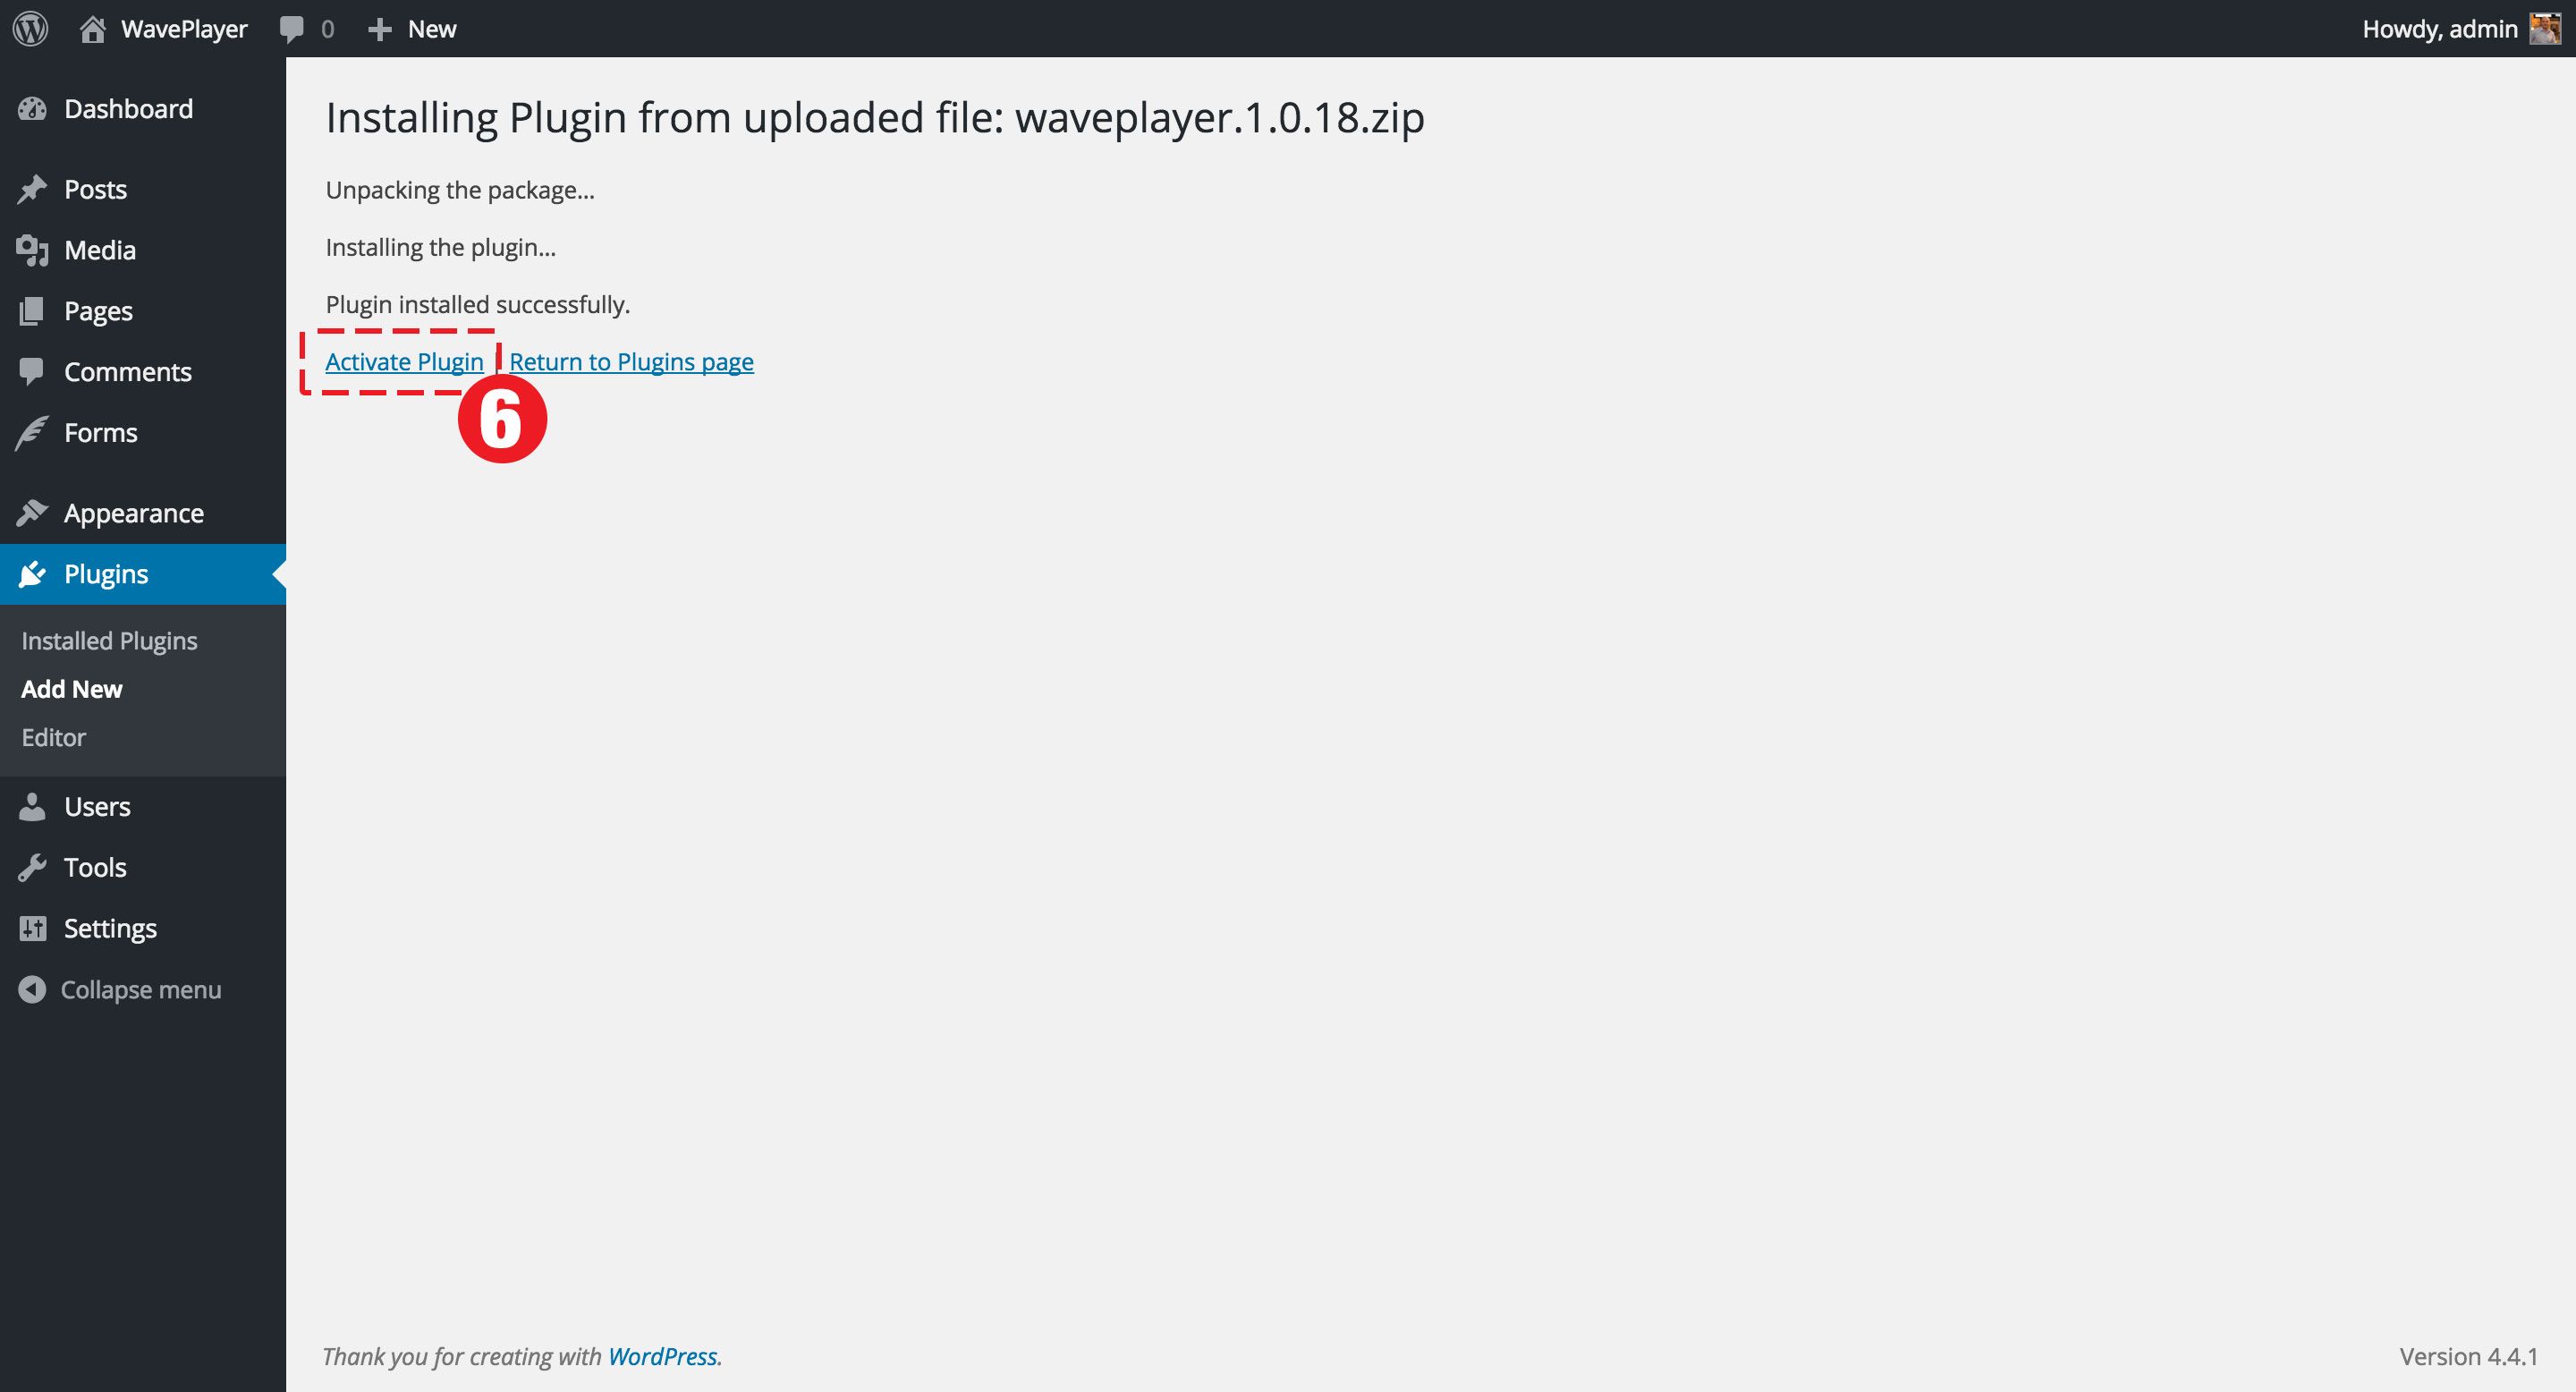
- Step 6
- Once WordPress has finished uploading the plugin files, click on the Activate Plugin link.
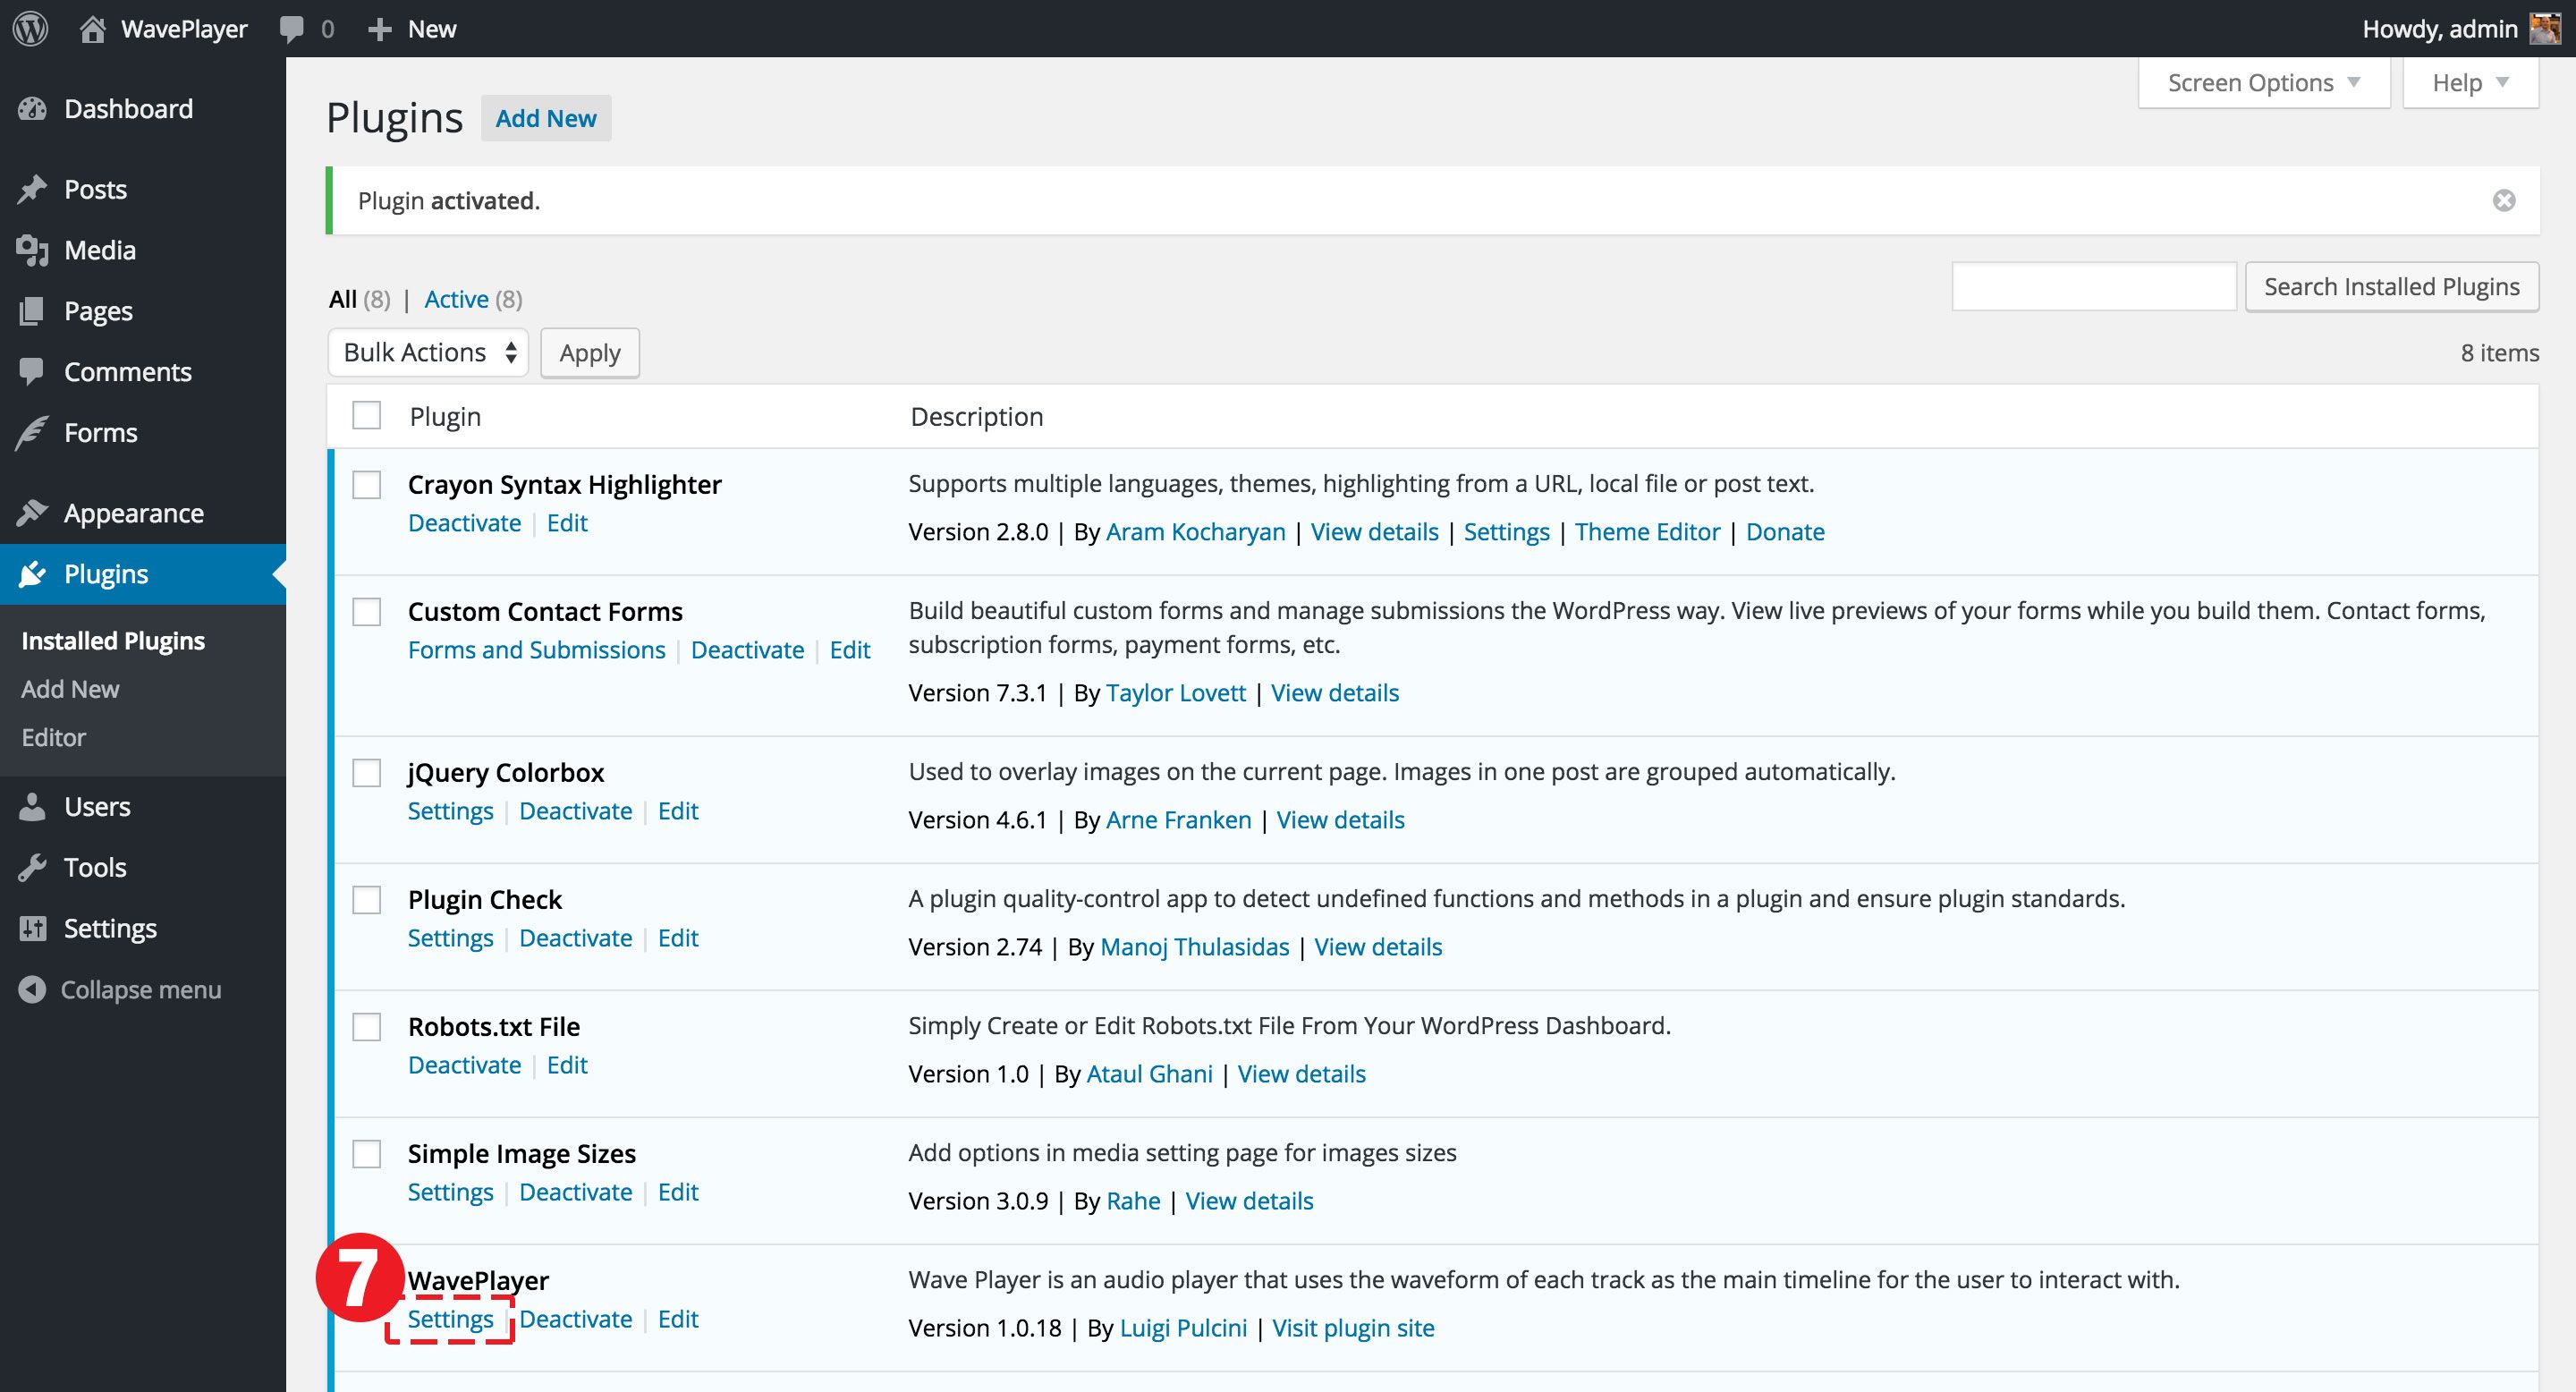
- Step 7
- The plugin is now active. You can click on the Settings link right below its name or go to Settings -> WavePlayer to configure its options.